Showing posts with label Guest post. Show all posts

Tuesday, January 8, 2013

On the Benefits of Pastured Chicken Eggs


Today's bounty from the henhouse
Along with raw milk and fermented dairy products, eggs from pastured chickens are one of the most nourishing foods on the planet.  Dr. Natasha Campbell McBride compares raw egg yolk to human breast milk because it can be absorbed almost 100% without needing digestion.  Egg yolks will provide you with the most essential amino acids, many vitamins (B1, B2, B6, B12, A, D, biotin), essential fatty acids, zinc magnesium and numerous other nutrients. 

We have a whole batch of young chickens hatched late spring here on the farm that just started laying and we once again have eggs for sale in the milk fridge.  You can tell from their vivid yellow-orange yolks that the chickens are eating their traditional diet of bugs, slugs, worms, even the occasional mouse or frog, supplemented with organic feed that is soy and corn free.  All these nutrients translate to a rich store of health enhancing carotenes.  The more carotenes, the darker, deeper orange color the yolk—and the higher the levels of fat-soluble vitamins as well. Eggs from pastured chickens also provide all eight essential protein building amino acids.

Our girls are out on green grass year round
For us parents, soft-boiled egg yolks are a great first food for baby.  Egg yolks, rich in choline, cholesterol and other brain-nourishing substances, can be added to your baby's diet as early as four months. (If baby reacts poorly to egg yolk at that age, discontinue and try again one month later.) Cholesterol is vital for the insulation of the nerves in the brain and the entire central nervous system. Since the brain is so dependent on cholesterol, it is especially vital during this time when brain growth is in hyper-speed.  Choline is another critical nutrient for brain development.

Store bought eggs on the left, eggs from our pastured chickens right
Why just the yolk for babies? The white is the portion that most often causes allergic reactions, so wait to give egg whites until after your child turns one.

In years past eggs have gotten a bad rap and if you listen to mainstream media you probably were scared to eat more than a couple eggs a week.  There is a great body of scientific evidence explaining how the body produces cholesterol as it's needed, to make up for what your diet doesn't supply.  Eating foods rich in cholesterol takes some of the work load off your body and even if you religiously follow a completely cholesterol-free diet, you will still have a lot of cholesterol in your body.  Your body has mechanisms in place to balance the cholesterol levels in your blood, whether you get it from food or it's produced by your body. Some people's natural, healthy cholesterol level is higher than others and a healthy body will balance this. 

Best idea yet - try to keep a few of your own hens in your yard so you always have an abundant source of nutrient dense eggs to eat or barter, or find a friend willing to house chickens for both of you. 

Truly pastured chicken eggs are hard to find but worth every effort to attain them! 

Charlotte Smith
@champoegcreamry
www.champoegcreamery.com
Charlotte passionately believes in the health benefits of a traditional foods diet, especially dairy products from grass-fed cows. She loves sharing time honored traditions of transforming milk into delicious and nutritious cheeses through her classes which also teem with nutrition facts and wisdom. Charlotte owns Champoeg Creamery, a pasture based raw milk dairy in St. Paul, Oregon, and is the mother of 3, a certified Nutrition Wellness Educator, and sits on the Executive Advisory Council for the Raw Milk Institute.


Saturday, November 3, 2012

Rescued Plums and Why Putting Up Matters

I had originally intended this post to just be about my unexpected, delightful plum harvest, but a thoughtful comment from a SFFT reader on my previous post made me realize that my surprise plums meant more to me than just something else to fill up my canning pantry.


My plums came to me by a lucky chance. One of my dear friends and SFFT reader Sara Buss had recently discovered a cluster of old plum trees at the edge of her property, after some brush had been cleared away.

I happen to have a penchant for both plums and secret gardens, so you can imagine my glee when she showed me the find.

Some of the plums were too soft and overripe to be saved, but we both came away with quite a harvest. Most of mine ended up going straight into jars, pits and all.

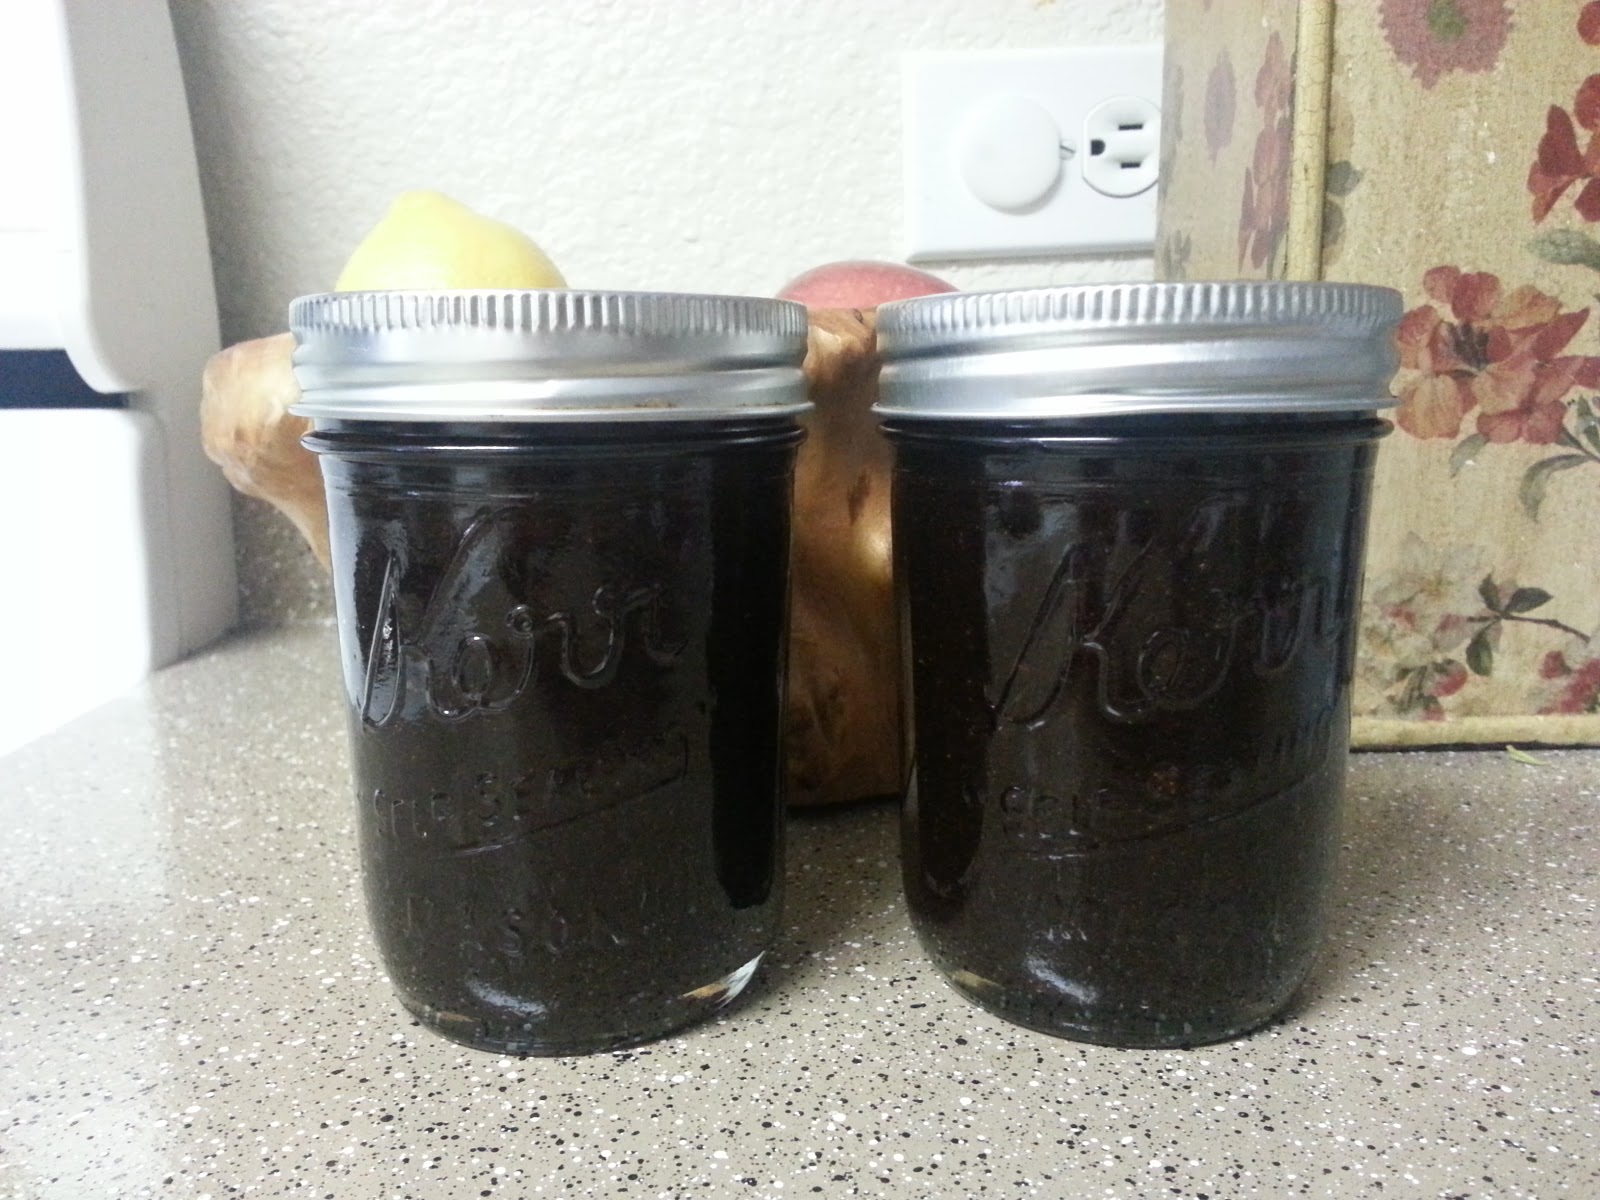
Whole canned plums. Recipe from the book Tart and Sweet.

The rest of them went first into my crockpot ...


...and then were blended with spices, lemon juice and sugar for plum butter.


I shared in my last post how I had foraged a single pear from an old tree growing on an abandoned lot in my neighborhood. One of our readers observed that there is a great deal of food that ends up rotting on the ground, particularly in urban areas. Meanwhile, we have a staggering number of U.S. residents who suffer from hunger. There are a multitude of complicated causes for this very sad contradiction; how we can produce an excess of food and let so many go hungry. I don't claim to be an expert on this issue and others much more qualified and informed than I am have already explored it in depth.

But what I do know, is that food matters.

What we do in our kitchens every day matters.

What we grow in our gardens, on our balconies and on our window sills matters.

The attitude we pass on to our children about their food and where it comes from matters.

And when we share what we're cooking and eating and learning with others, that matters too.

And no, I don't think my canned plums are going to solve our deeply rooted cycles of poverty and hunger.

Canning condiments in pretty jars will not change the world.

But you have to look a bit closer than that. What if it's just the act of harvesting and preserving that makes the difference? That inspires and empowers us and others to feed our friends and families? What if making use of a few dozen pieces of fruit from an overlooked tree led to an entirely different outlook on the issue of access to available food resources?  What if it helped us to see with new eyes the need for a more generous and fair food system?

That might change the world.

I love so much this inspiring post from Alana over at Eating from the Ground Up. I'll quote part of it here, but please go read the whole thing. It's perfect.

"Because those acts of filling, preserving, creating, feeding–I really do think it’s the actions themselves that create change. The jars are pretty and the contents are delicious, and that seems to me to be enough of a reason to give it a shot. But for me, the real capacity for change comes in the events that come after we fill the jar. If I can do this, what else can I do? What else can I make and create?"

Those are powerful words, friends. Let's not underestimate ourselves. If we're making and sharing and creating with eyes and hearts open to the needs among us, I think we really might just accomplish something crazy.

Like that whole world-changing thing.

Thank you again to Sara Buss for sharing her unexpected plum bounty with me! Thank you also to SFFT reader Daughter of the Glade for her thoughtful observations.


Rebekah Pike 
Rebekah is happiest with her nose in a book and enjoys making the most of her pint-sized, apartment kitchen. After leaving work in media production to become a full-time mommy, she began exploring the sustainable living movement, reconnecting with the back-to-the-earth ideals of her hippie parents. She met her husband, Darian, in 2005, working as a camp counselor in Oregon's rugged outdoors. Most of their time is spent chasing after their two year old daughter, Ashlynn, and doing serious “research” at Portland's restaurants, coffee shops and markets.

Sunday, October 21, 2012

Preparing Bone Broth from Pastured Chickens: How and Why

Our chickens on lush July pasture
Raising pastured chickens in Oregon is a seasonal endeavor, beginning with chicks sometime in the spring and butchering the last birds by the time the grass is starting to slow its growth.  Different grass varieties grow at different rates throughout the year, but a good rule of thumb for our local pasture grasses is that it grows fastest between 50-72 or so degrees Fahrenheit.  This means we are just completing our last butchering for the year and coincidentally, it coincides with soup and stew season.  We always have lots of stewing chickens available which make the most wonderful soup stock!

I've been making soup stock/bone broth for the past 25 years, and learned from watching my mom in the kitchen with her soup pot bubbling and the wonderful aromas of herbs and aromatics filling the house for 24 hours. It wasn't until the last few years that I actually found out why bone broths are so important in our diet and I began researching this wonderful and simple food.

Now we have science that validates what my mother and her mother knew intuitively - rich, homemade chicken broth helps cure colds.  It helps with digestion - the gelatin in the stock aids in the digestive process and stock contains minerals in a form the body can absorb easily—not just calcium but also magnesium, phosphorus, silicon, sulphur and trace minerals. It contains the broken down material from cartilage and tendons--stuff like chondroitin sulphates and glucosamine, now sold as expensive supplements for arthritis and joint pain.  The Weston Price Foundation recommends you begin each meal with a small bowl of bone broth based soup.

I also wondered why sometimes my stock gelled and sometimes it did not.

Sarah Pope of "The Healthy Home Economist" has a bog post on "5 Reasons Your Stock Won't Gel" and I've pasted it below:
  1. The stock rolled at too high a temperature.  If stock is simmered too high, the heat will break down and destroy the collagen.  To see what the perfect simmer on your stock should look like, see my short video on my website.
  2. The stock did not roll long enough.  Once you get that perfect simmer or “roll” going, be sure that chicken stock rolls for 6-24 hours and beef stock for 12-50 hours.  Less than that will likely not draw enough gelatin into the stock from the bones.
  3. Not enough of the right kind of bones were used that yield gelatin.  To get the right mix of bones that yield gelatin versus other types of bones that add flavor and color, make sure you use one of the following methods:  1 whole, free range layer hen with neck and wings cut up, 3-4 lbs of boney chicken parts which includes a combo of necks, backs, and wings, OR the picked carcass of 2 meat chickens.  For beef stock, use about 7 lbs bones total (4 lbs of boney bones and 3 lbs of meaty bones).
  4. Too much water was used in proportion to the bones.  For chickens, the correct proportion is 3-4 lbs of bones per 4 quarts of filtered water. For beef stock, the correct proportion is 7 lbs of bones per 4 quarts of water or more to cover.
  5. Using bones from battery chickens or chickens raised in cages.  Conventionally raised chickens or chickens raised in cages typically yield little to no gelatin.   It is worth the extra money to get quality when you buy meat especially if you will be using those bones to make stock
I thought it is interesting that store bought chickens not raised on pasture do not have enough gelatin.  We have a freezer full of USDA butchered pastured stewing chickens available for purchase just for this purpose!

Chicken Stock - from the Weston A. Price website
1 whole free-range chicken or 2 to 3 pounds of bony chicken parts, such as necks, backs, breastbones and wings*
gizzards from one chicken (optional)
2-4 chicken feet (optional)
4 quarts cold filtered water
2 tablespoons vinegar
1 large onion, coarsely chopped
2 carrots, peeled and coarsely chopped
3 celery stalks, coarsely chopped
1 bunch parsley

*Note: Farm-raised, free-range chickens give the best results. Many battery-raised chickens will not produce stock that gels.

If you are using a whole chicken, cut off the wings and remove the neck, fat glands and the gizzards from the cavity. Cut chicken parts into several pieces. (If you are using a whole chicken, remove the neck and wings and cut them into several pieces.) Place chicken or chicken pieces in a large stainless steel pot with water, vinegar and all vegetables except parsley. Let stand 30 minutes to 1 hour. Bring to a boil, and remove scum that rises to the top. Reduce heat, cover and simmer for 6 to 8 hours. The longer you cook the stock, the richer and more flavorful it will be. About 10 minutes before finishing the stock, add parsley. This will impart additional mineral ions to the broth.

Beautifully gelled broth.

Remove whole chicken or pieces with a slotted spoon. If you are using a whole chicken, let cool and remove chicken meat from the carcass. Reserve for other uses, such as chicken salads, enchiladas, sandwiches or curries. Strain the stock into a large bowl and reserve in your refrigerator until the fat rises to the top and congeals. Skim off this fat and reserve the stock in covered containers in your refrigerator or freezer.


Cooper is our charismatic and loyal chicken guardian,
protecting them from predators day and night
Austin catches this bad boy to ready him for the freezer
Marc and Charlotte, farming to provide
our community with nutrient dense food.

Charlotte Smith
@champoegcreamry
www.champoegcreamery.com
Charlotte passionately believes in the health benefits of a traditional foods diet, especially dairy products from grass-fed cows. She loves sharing time honored traditions of transforming milk into delicious and nutritious cheeses through her classes which also teem with nutrition facts and wisdom. Charlotte owns Champoeg Creamery, a pasture based raw milk dairy in St. Paul, Oregon, and is the mother of 3, a certified Nutrition Wellness Educator, and sits on the Executive Advisory Council for the Raw Milk Institute.

Wednesday, September 12, 2012

Back to School - Lunch Time!


Once again another summer has flown by way too quickly and I realize school time is here already!!  Mornings are hectic around here - everyone needs to be washed and combed and dressed and fed and brushed and out the door by 7:15, so I can go milk cows.  In the midst of all this chaos we still need to plan ahead for lunchtime, too.

There are many attempts around the U.S. to make school lunches healthier - but most schools are still like our local school and have a very small budget to work within, which means heavy on the carbs and starches and processed foods to remain within budget.  For those of you trying to eat a traditional foods diet this can be frustrating.  Many of us working moms would love the convenience of school lunches but know we have to prioritize our children's health.

You also have to consider your kid's personality - are they the type that has to fit in and doesn't want to be different so therefore has to have the same hot lunch everyone else is having, or will they be able to stand up for their homemade grub that doesn't come in fancy shapes with a cutesy name?  This may determine how traditional looking you make your lunches.

Shivan's lunch this week - meatballs, enzyme rich ketchup, fruit, yogurt smoothie.

Let Them Help

I have found that if my daughter gets to choose her lunch foods and helps prepare it then she has complete confidence eating it in front of all the pre-packaged and fried goodies that her friends have.  Now that she's 5 she loves to help by cutting up her own fruit and veggies and packaging them in her lunch box and she also helps make her own smoothies in the blender.  We also practice the 80/20 rule at school, just like we do at home.  If we eat a traditional foods diet 80% of the time than we give ourselves 20% leeway.  In this case I let her choose one lunch per week if she'd like to indulge in a cheeseburger or spaghetti or "chicken" nuggets.  This also gives me an "out" if we are really running late or I ran out of time to prepare for lunch.  Moms - it's ok to give yourself some grace and not be perfect every time!!

This week when I asked her what she wanted in her school lunch box she said, "meatballs, oranges, grapes and a yogurt smoothie."  Excellent choices!! I was so proud of her!  So this is what we are starting with the first week.  She helps me make kefir smoothies with honey and frozen blueberries we picked this summer and we put it in a thermos and it stays cold enough for her to drink it through a straw.  She's not a big sandwich person so meatballs or hunks of our home raised chicken is just right and she's huge on mixed fruit, especially if she can peel the little "cutie" oranges herself.

Other great options we will prepare:  steamed broccoli and carrots and some homemade hummus or ranch dressing to dip them in.  For the dip, I simply make some fromage blanc with raw milk, stir in some minced chives, parsley and garlic salt and it tastes just like ranch dressing from the store only far healthier.  If you mix the fromage blanc with a little honey it makes a nutritious and delicious fruit dip, too.  It can also be spread on bread or a tortilla for a sandwich - stack it or roll it with other goodies your child will eat. 

Sneak in the Enzymes

A challenge for me is getting enough fermented veggies in my kid's bellies - I still have to disguise them or mask them.  This week I am serving our homemade ketchup with her meatballs.  We use Sally Fallon's recipe from Nourishing Traditions which I've listed below.  Shivan also loves the homemade fermented pickles and has no idea they are full of enzymes to help start the process of digestion and reduce the strain on the pancreas.  Traditionally fermented salami slices are another healthy meat option whether on a sandwich or roll up with some fromage blanc again. Yogurt and kefir and even raw milk in a thermos will satisfy, feed the brain and the immune system!

Additional lunch box ideas:
  • hard boiled eggs, sliced plain or in sandwiches and wraps
  • homemade (or purchased :) raw milk cheeses, cubed 
  • sliced traditionally fermented salami
  • pepperoni sticks from (our) grass fed beef cow
  • muffins with grated zucchini, carrots, or sweet potato
  • sliced pita triangles dipped in hummus or fromage blanc dip
  • homemade chicken soup packed in a thermos 
  • Leftovers! - lasagna, pastas, casseroles in a thermos are all satisfying and nutritious

Lacto-fermented ketchup, rich with enzymes, is easy to make - mix the ingredients together and let ferment on the counter for a couple days.

Nourishing Traditions "Ketchup"

3 cups canned tomato paste, preferably organic
1/4 cup whey
1 tablespoon sea salt
1/2 cup maple syrup
1/4 teaspoon cayenne pepper
3 cloves garlic, peeled and mashed
1/2 cup homemade or commercial fish sauce
Mix all ingredients until well blended.  Place in a quart-sized, wide-mouth mason jar.  The top of the ketchup should be at least 1 inch below the top of the jar.  Leave at room temperature for about 2 days before transferring to refrigerator.


The Healthy Home Economist has a great recipe out this week for Lacto-Fermented Sloppy Joes using this homemade ketchup - we will definitely be eating them this week.

Make your back to school lunches delicious as well as nutritious and your kids will be equipped to fight off all those back to school colds!

Warmly,
Charlotte

Charlotte Smith
@champoegcreamry
www.champoegcreamery.com
Charlotte passionately believes in the health benefits of a traditional foods diet, especially dairy products from grass-fed cows. She loves sharing time honored traditions of transforming milk into delicious and nutritious cheeses through her classes which are also teeming with nutrition facts and wisdom. Charlotte owns Champoeg Creamery, a pasture based raw milk dairy in St. Paul, Oregon, and is the mother of 3 and a certified Nutrition Wellness Educator.


Thursday, July 26, 2012

Keeping Food (and everything else) Simple

Once upon a time, back in one of my former lives ... pre-husband, pre-baby, pre-permanent address ... I was a college student who arrived at school with three suitcases and one large box. All of my worldly possessions fit in those four containers, with the exception of a few items back at my parents' home which had been deemed too cumbersome to ship. I set up house in one wee corner of the dorm room and proudly sent pictures of my new home to my family, who immediately expressed great concern about my lack of ... you know ... stuff. But by that point, I had learned a secret - once you pare down to the bare necessities and few, well-edited luxury items, you don't miss all the items you left behind. In fact, you start to wonder why you let them clutter up your life in the first place.

I know this is supposed to be a food blog. I'm getting there, I promise.

Anyway, times have changed. Here I am with a marriage and three year old and an address that hasn't changed in a whole two years. And yes, there is something to be said for putting down roots and getting comfortable. But with comfort, clutter inevitably follows. So we've had a month of sorting - evaluating - purging wardrobes and streamlining the processes that make our little household hum along smoothly. It's still a work in progress, but opening a closet door and seeing only half of what I used to see is so rewarding.

So ... Food. Simplicity. Where am I going with this?


Well, as I've been working to simplify my home and trim our possessions down, I've felt the urge to apply the same ideas in my kitchen. Eating real food tends to mean a lot of cooking and cleaning up - A LOT. And many times, it means starting with scratch ingredients and not reaching for as many convenience items as you used to. So my question from day one of my journey toward better eating has been, "How do I do this without losing my mind and feeling like I'm trapped in my kitchen all day??"

Now maybe some of you lovely readers never have these crazy feelings of your kitchen walls slowly closing in on you, and if it brings you joy and relaxation to cook up delcious eatables all day long - by all means - carry on. If however, like me, you maybe like to cook, but scare easily at the sight of a long ingredient list, you may find the whole process of putting food on the table much more enjoyable if you pare it down to the neccesities, plus a few luxury items.

All you really need to make a meal is a protein (so many options ... quinoa, beans, eggs, dairy, meat), a simply prepared vegetable or fruit and maybe a starch to round it out. This idea seems elementary, but I've found it immensely helpful when faced with cookbook after cookbook filled with beautiful, glossy images of perfectly crafted meals. Don't you just love it when you pick up a book with an innocent-sounding title, that promises easy and simple meal ideas, only to find that EVERY RECIPE requires 50 ingredients and hours of prep time? I dare any one of these cookbook authors to make one of their meals in my teeny kitchen, with my three year old clamoring for more Veggie Tales and a snack every few minutes and then tell me how simple they are. Argh.

Here's my point - you can make simple, yummy meals from basic ingredients, get them on the table within a reasonable amount of time and not lose your mind in the process.

Try this - next time you run across one of those beautifully photographed recipes that - let's be honest - we all love to dream about making, try to reimagine it in a way that makes sense for your life. Sometimes, I run across a single element of a recipe, like a sauce, that I love - but I wouldn't bother making the whole recipe for everyday meals. So I just take that yummy sauce and apply it elsewhere. For example, I stumbled upon this recipe for skirt steak with parsley-garlic sauce. I've made the recipe a couple of times, but steak is not something we can afford to eat regularly. However, I haven't found a protein yet that doesn't match well with that sauce. It's reallyreallyreally good on pretty much anything! Eggs, sausages, fish ... Using a punchy, flavorful sauce is a great way to dress up a simply prepared protein item.

And vegetables ... sometimes I forget that all you really need to make most veggies yummy is a quick steam or light sautee, a drizzle of olive oil or butter and a sprinkle of salt and pepper. Easy. Simple. No involved preparations. Once of my favorite things to eat in the world are steamed new potatoes, left whole in their jackets or quartered, with melted better and sprinkling a fresh herbs (any kind you like). So. Good.

~Carrots slowly sauteed in butter, seasoned with salt, pepper and a pinch of cumin~

I may or may not be obsessed with this recipe for falafel sandwiches - it starts with canned garbanzo beans for speed and convenience, but if you cook beans yourself on a regular basis, by all means substitute those instead. With the help of a food processor to mash the ingredients together, you can have them on the table in less than 30 minutes. I'm terrified of deep-frying anything, so I simply fry small patties of the falafel mixture in a few tablespoons of coconut oil. Falafel sandwiches are particularly yummy with this tzaziki recipe, which I just started making recently. It's shockingly easy and it's the perfect complement for the falafel. It also makes a great appetizer for guests when served with pita chips.

*Note: I add an egg to the falafel mixture because I think it helps bind the ingredients together a little better. However, without the egg, this recipe can be made vegan.*

Those are just a few of my favorites - how do you keep it simple in your kitchens?
Please feel free to share!


Rebekah Pike 
Rebekah is happiest with her nose in a book and enjoys making the most of her pint-sized, apartment kitchen. After leaving work in media production to become a full-time mommy, she began exploring the sustainable living movement, reconnecting with the back-to-the-earth ideals of her hippie parents. She met her husband, Darian, in 2005, working as a camp counselor in Oregon's rugged outdoors. Most of their time is spent chasing after their three year old daughter, Ashlynn, and doing serious “research” at Portland's restaurants, coffee shops and markets.

Thursday, June 21, 2012

Pearled Barley Lager Summer Stew


Most anything I make is based on availability and craving. The other day soup sounded really good so I threw a bunch of stuff we had on hand into a pot and called it stew. A delicious and hearty vegan-y stew!

I had frozen some leftover vegetable stock in its container before we left for Denver because I made one of those recipes that just calls for 2-4 tablespoons of broth. Really?

A special thing about this recipe is it starts off as a soup but evolves into a stew, thanks to the pearled barley. I bought some pearled barley a few months ago and have been at a loss for what and how to use it. I see on instagram some use it in replacement of rice. The one time I cooked it by itself, I was unimpressed and the bag has sat in the pantry ever since. Soup provides a great solution for transporting almost any grain out of your pantry. I may even buy it again because it was delicious in this soup!

Make use of the bounty of produce available at your farmer's markets to create a 'local' variation of this. I've seen a lot of zucchini and carrots teeming the tables at Portland's PSU farmer's market.

My husband took notice that something yummy in this reminded him of meat - in the texture sense - we finally deduced that it was the plumped up sun-dried tomatoes.

One of the other special ingredients in this is a black lager. I threw in the lager last minute because we had it and I thought it would be interesting. The lager provided a great back drop to the stew's depth of flavor without overwhelming the whole pot. Perfect. Stuff like this will happen when you take a look in the fridge for that one other ingredient you could add. I remember years ago making Guinness cakes and Guinness stew so why not a lager stew? I think a dark stout would also work. Let us know what local brews you used.

I made this on Saturday and we just finished up the last bowls for lunch today.  This stew will only graduate in flavor as the days go on.  Feel free to freeze it if you don't want to eat stew constantly for a few days. If you use ball jars, make sure you leave about an 1" of space at the top to avoid a broken jar and wasted soup - in your freezer.

  •     1 tablespoon extra virgin olive oil
  •     1 cup red/white onion, chopped
  •     6-7 garlic cloves, minced
  •     1 1/2 cups pearled barley, rinsed in a colander
  •     12 cups vegetable broth OR (4 cups vegetable broth + 8 cups boiling water + 3 vegetable bullion cubes)
  •     1 - 12oz bottle of dark lager (I used Baba Black Lager)
  •     5 stalks celery, chopped
  •     3 large carrots, chopped
  •     1 small zucchini, halved and sliced
  •     6 baby bella mushrooms, sliced
  •     1 - 2 cups sun-dried tomatoes, soaked for an hour, then thinly chopped
  •     1 cup cilantro, chopped
  •     1 tablespoon Italian seasoning
  •     1/2 teaspoon poultry seasoning
  •     sriracha or cayenne pepper to taste
  •     ground pepper to taste

In a stock pot, heat up the olive oil on medium heat and toss in the onion and garlic. Saute 2-3 minutes, turning down the heat if necessary.
Add rinsed pearled barley and saute another 2 minutes.
Now add vegetable broth and dark lager, bring to a boil.
Add remaining ingredients, turn down heat to a simmer and simmer for about an hour.

Garnish with some additional fresh cilantro and enjoy with large pint!

Michelle Felt
@meeshfelt
www.feedyourskull.com
Michelle is a graduate of the Raw Gourmet Institute in Chicago, Illinois. Having grown up in the suburbs of Chicago, she has recently relocated to Portland, Oregon, where the produce is crazy fresh abundant and the culture is as thick as the Midwest’s humidity. She loves raw foods and advocates for eating with realism and relish. "Approach each eating experience as an opportunity to nourish your body, eating the best you can, in the moment."

Wednesday, June 20, 2012

How To Find Safe and Nutritious Raw Milk

Raw milk has become a very hot topic in Oregon this spring!  Even though the publicity was started because several people became ill, demand is still increasing as others become aware of this traditional food and its health benefits.

Raw milk farmers in Oregon are very limited in the amount we can produce so when looking for raw milk you may have to call/visit a number of farms before you can find availability.  In our state, raw milk is not regulated by the government, therefore the consumer must be very discerning.  I'm suggesting the following set of guidelines as a tool for all you new-to-raw-milk drinkers who are contemplating adding this wonderful food to your family's diet.

My girls LOVE their raw milk!!

Buying Raw Milk Locally If a farmer follows the proper procedures to produce safe, clean, and nutritious raw milk, it is very easy to do so every time.  When looking for a farm to purchase raw milk from, I recommend the consumer do the following:

1. Ask for a tour. If a farmer won’t let you tour their property then I would not buy milk from them. When you meet the farmer they should be open to sharing their practices and answering all your questions. Do you trust this person, what they say and do? Ask for references of several customer’s names and numbers who’ve been getting milk from the farmer for some time and call the customers.

 2. Look at the cows out in the pasture.  Are the cows on tall (at least 4") green grass vs. dirt? Are the cows clean, is the feeding area clean, is the barn clean, how does the place smell? How many cows are on the property vs. the acres of grass?  Are the cows rotated to fresh pasture daily?  Every 2 or 3 days?  Does the farmer have access to irrigation so the cows are on fast-growing grass for 9 months of the year, or is the grass gone by July, meaning the cows are truly grass-fed only 3-4 months of the year? Tall grass pasture keeps the cows cleaner and therefore the milk safer to produce.

3.  What does the farmer feed the cows, in addition to pasture?  The most nutritious and safest milk comes from grass fed cows on tall, green pasture.  These cows should be supplemented with some kind of grain, perhaps rolled barley or oats.  They need minerals daily and free choice of salt.  Alfalfa and grass hay are the best hay choices if they must supplement or if it's winter and pasture is not available. 

4. Look at the milking area.  Is it clean? A dirt floor in a barn can be a clean place to milk, look to see if it is free of manure and bedding.  How is the milking equipment cleaned? (vinegar/water rinse, hot soapy water rinse, bleach/water rinse).  And how are the milk jars sanitized? Where is the milk handled and is that area clean?  How is the milk chilled? Is it in an ice bath or just placed in a freezer or fridge (cools down much slower which could allow for illness causing bacteria to grow)

5.  Testing.  How often is the milk tested for bacteria? Cows should be tested daily to weekly with the California Mastitis Test and at least monthly milk samples should be sent to a lab for cultures. Ask to see the written results of lab tests.

6. Ask if they use organic and/or sustainable farm practices.  No hormones; occasional antibiotics only when necessary, 50% or more of the feed coming right off the farm.  Regular vaccinations should be used following an organic dairy plan. 

Overall, be an informed consumer. Be confident in the choice to drink raw milk so you can educate your friends and family who will ask how you can be sure it’s safe. If you follow these procedures then you will be assured the milk you bring home is safe to drink. Once you bring your milk home make sure it’s kept covered in its container and refrigerated to 37-40 degrees F.
 
Oregon law allows raw milk sales on the farm only, and only if you are milking fewer than 3 cows or nine goats.  With so few cows I am able to look them over thoroughly twice daily to be able to be confident in their good health.  I have the opportunity to thoroughly inspect the animal and the equipment because there are no industrialized or huge automated pieces of machinery that might fail.  Food produced by hand on such a small scale is very safe if you have an educated farmer who’s passionate about high quality.  If profit takes priority over quality, then the quality suffers.  Get to know your farmer and where their values lie in regard to this topic.

Consumers of raw milk in Oregon also have the responsibility to educate themselves on the high costs involved with producing hand crafted food on a small scale.  If raw milk dairies are following the proper procedures for feeding and handling the cows and the milk, they are lucky if they cover the costs of production.  It is a very difficult lifestyle to own dairy cows on this small scale.  If you plan on enjoying the remarkable taste and health benefits of raw milk, plan on paying what it’s worth.

Milk mustaches rawk!!

Editor's Note: Charlotte is now serving on the Executive Advisory Committee for the newly formed Raw Milk Institute alongside Sally Fallon Morell, Dr. Joseph Mercola, and several other excellent champions of real food. It's been troubling to watch the news of controversial raw milk issues in Oregon from so far away, but I'm grateful to know that farmers like Charlotte are more committed than ever to educating consumers and producers and protecting the rights of the public to access safe, clean, raw milk.


Charlotte Smith
@champoegcreamry
www.champoegcreamery.com
Charlotte passionately believes in the health benefits of a traditional foods diet, especially dairy products from grass-fed cows. She loves sharing time honored traditions of transforming milk into delicious and nutritious cheeses through her classes which are also teeming with nutrition facts and wisdom. Charlotte owns Champoeg Creamery, a pasture based raw milk dairy in St. Paul, Oregon, and is the mother of 3 and a certified Nutrition Wellness Educator.


Sunday, April 29, 2012

Wholesome{ish} Chocolate Chip Cookies

I was my family's official cookie and dessert baker growing up. Someone gave me a children's alphabet cookbook when I was about six and I was instantly hooked.

My saintly mother allowed me to destroy the kitchen almost as often as I wanted with my baking messes and was unwavering in her praise and encouragement of my efforts, which were ... humble ... at best. Cookies were my favorite thing to make and even though I've progressed in my baking skills quite a bit since that first cookbook, I still have a major weakness for a homemade cookie.

Recently, I went on a quest to find the perfect chocolate chip cookie recipe.

Serious. Stuff.


So I tried a bunch of different recipes, looking for chocolate chip perfection. It had to be chewy and dense, but not mushy. It needed to have crispy, caramelized edges, but remain soft and moist at the center. It needed to contain the right amount of chips - too many and all you taste is chocolate. Too few and all you've got is a glorified butter cookie.

You can tell I thought about this way too much, huh? Yep.


At long last, I stumbled across this recipe over at Lovin' From The Oven and gave it a try. Oh, the buttery, vanilla-y, chocolatey perfection! Sooooo good!


So this week I gave this amazing recipe a little makeover. I substituted sucanat for the brown sugar and replaced half the all-purpose flour with white whole wheat flour.

Health food? Not really. But if you're going to indulge in a sugary treat, why not bump up the nutritional profile a little bit?

The white whole wheat flour worked so well in these, that I'm thinking I might use it exclusively in the next batch and skip the white flour all together. They definitely did not get heavy or dry the way some recipes do with whole grain flour.

I've read different things about using sucanat in recipes ... some sources say to use a cup-for-cup substitution. Some say to use slightly less or even to reduce it to 2/3 c. sucanat for every 1 c. of sugar. In the recipe below, I left the amounts of sugar as written in the original recipe. When I tested it with sucanat, I used about 3/4 c. of sucanat and just under 1/2 c. of white sugar. Experiment and see what works best for you!

Wholesome{ish} Chocolate Chip Cookies
 ~adapated from My Favorite Chocolate Chip Cookies at Lovin' From the Oven

1 cup all-purpose flour
1 cup white whole wheat flour
1/2 teaspoon baking soda
1/2 teaspoon salt
3/4 cup unsalted butter, melted
1 cup sucanat (or slightly less)
1/2 cup white sugar (or slightly less)
1 tablespoon vanilla extract
1 egg
1 egg yolk
1 - 2 cups semi-sweet chocolate chips (I prefer fewer chips, so I use 1 cup)

Whisk together the flours, baking soda and salt and set aside. Cream together the melted butter, sucanat and white sugar. Beat in the vanilla, egg, and egg yolk. Stir in the flour and mix just until blended. Stir in the chocolate chips. Chill the dough for at least an hour.

Preheat the oven to 325 degrees.

Drop cookie dough by 1/4 cup scoop onto greased or parchment-lined cookie sheets (You can make them smaller if you want - just reduce the baking time a bit). The cookies should be about 3 inches apart. Bake for 15 to 18 minutes or until the edges are a light golden brown. Rest on baking sheets for a few minutes before transferring the cookies to a wire rack.

Enjoy!!


Rebekah Pike 
Rebekah is happiest with her nose in a book and enjoys making the most of her pint-sized, apartment kitchen. After leaving work in media production to become a full-time mommy, she began exploring the sustainable living movement, reconnecting with the back-to-the-earth ideals of her hippie parents. She met her husband, Darian, in 2005, working as a camp counselor in Oregon's rugged outdoors. Most of their time is spent chasing after their two year old daughter, Ashlynn, and doing serious “research” at Portland's restaurants, coffee shops and markets.


Wednesday, April 25, 2012

A Cup of Kefir A Day Keeps the Doctor Away!

Here is all you need to make kefir: milk, kefir grains, and a jar to culture it in.

“All diseases begin in the gut.” This is a wonderful phrase coined by Hippocrates more than two thousand years ago and the more we learn, the more we realize just how right he was. If we are doing all we can to have a healthy digestive system our immune system will also be strong.  Fermented dairy products, especially kefir, are some of the best foods for our digestive system.

Kefir, a somewhat sour, yeasty, and effervescent lacto-fermented beverage is gaining enormous popularity!  January 2 of this year I began getting daily requests for kefir grains, which I just attributed to a few New Year’s Resolutions… however, those requests have not stopped and the grains are flying out the door!

Kefir originated in the Caucasus Mountains, in the former Soviet Union, and seemed to have been developed by shear accident.  The villagers of this area consumed the nutritious beverage in large quantities and were renowned for longevity, living long, healthy lives with little to no known disease. An active life span of over one hundred years was common for folks living in the region where kefir was cultured and liberally consumed as part of a staple diet.

Kefir is probably the easiest cultured milk beverage to make at home, easier then yogurt because it cultures right on your countertop – no need to find a warmer place to incubate it.  Whereas yogurt can be cultured from previous batches of yogurt, kefir can only be cultured using kefir grains.  Kefir grains are self perpetuating, increasing in volume with each batch you make, and therefore need to be divided over time.  If you ask around I’m sure you can find a local source – perhaps a friend with some extra to give away.  Kefir grains are not a grain at all – just initially labeled that because of their appearance and granular structure.  They are created through a dynamic association of friendly lactic acid bacteria, vinegar-producing bacteria and healthy yeast strains.

Identical as well as adorable twin sisters Cathy and Connie live nearby and culture about five gallons of raw milk into kefir each week in order to maintain strong immune systems.

As their cultures grow, they keep a steady supply of kefir grains coming my way – and I am able to pass them on to others all week.  Given that they drink more kefir than anyone I know, I asked them a few questions regarding their experience with kefir.

They each drink about 1-2 cups daily of kefir, drinking mostly in the morning but Connie and her husband enjoy a tall glass in the evening, too.  They, like me, find that it can be an acquired taste – they recommend getting used to the flavor gradually, perhaps adding maple syrup, raw honey, frozen juice concentrate or fruit compote to soften the sour flavor at first, and work your way up to being able to drink it plain if you choose.

It gets sourer and healthier the longer you leave it on your countertop – I leave mine about 24 hours, Connie ferments hers about 36 hours and Cathy cultures her about 48 hours.  I guess I’m the wimpy one of the bunch!

Initially, Cathy and Connie started drinking kefir in order to add beneficial probiotics to their diets to strengthen their immune systems, and they also chose kefir because it is the easiest of the cultured dairy products to make - you simply add kefir grains to a jar of milk and place it on your countertop to culture for a day or two.  It’s also a good idea to cover it with a towel to protect it from nutrient damaging light.

Cathy and Connie both credit kefir with preventing illness and for strengthening their immune systems immensely in the past few years.  Cathy used to get every passing bug and it would take weeks for her to recover from them.  As of today she has not been sick in a year, even though her husband has brought home a couple very nasty illnesses. 

Cathy also used to suffer from several food intolerances and breaking out in hives was a common occurrence, but since beginning kefir consumption hives are now a very rare occurrence.  Connie enjoys not having to worry about being exposed to others’ illnesses, confident her strengthened immune system will fight it off and additionally, she is now free of previously annoying digestive problems.  These two ladies are very trim and fit and Connie credits her figure to kefir being such a completely nourishing and satisfying food.
Simply place one or two of these kefir grains in a quart jar, fill with milk,
and place on counter top with lid loosened for 24 hrs. until thickened

Charlotte Smith
@champoegcreamry
www.champoegcreamery.com
Charlotte passionately believes in the health benefits of a traditional foods diet, especially dairy products from grass-fed cows. She loves sharing time honored traditions of transforming milk into delicious and nutritious cheeses through her classes which are also teeming with nutrition facts and wisdom. Charlotte owns Champoeg Creamery, a pasture based raw milk dairy in St. Paul, Oregon, and is the mother of 3 and a certified Nutrition Wellness Educator.

Tuesday, April 17, 2012

So You Want to Be a Farmer?


A few months ago when Bethany asked me to be a contributing writer on her blog, my first thought was, "What could I possibly write about?" I was expecting my 6th child, and we were really busy on our farm. I agreed to write if I could wait until my baby was born. That also gave me a little time to think about what to share.

I sat down and made a list of some of the questions people have asked us over the years. The most common questions we get asked are about why we became farmers, and how someone else can get started.

I'm not surprised, since we used to ask the same questions to the farmers we used to buy from. We also read any farming book we could get our hands on. For us, we finally made the decision to move to the country and buy a cow when we were sick and tired of being sick. I began dreading going to the store when I thought about the frustration of reading labels and knowing I really didn't have much control over what my family ate. My husband and I used to take shifts staying up at night with one or more of our children when they were suffering with chronic croup. Something had to change!

We began our farming adventure in the city by ripping out our front lawn and planting a large garden.

We bought a few chickens and rabbits for meat and eggs, but it was no longer enough. I wanted to raise my own beef, milk my own cow, make my own cheese. We wanted to provide all these things to other families as well!

When people ask us how they can become farmers, the answer really depends.

We encourage people to read a lot. Especially all of Joel Salatin's books.

The first step, we believe, is to know why you want to farm. If it's just a hobby for you, then when you've had a really long, rough day, only to finally sit down at 10:00pm, and then realize your pigs got out, you have to have something to remind yourself it really is worth getting up and herding them back to their pasture. For us its our health, and the health of our customers. Almost every single one of our customers has told us that our food has helped cure an ailment that they or their children have been suffering from. What could be better than that?

So you want to be a farmer?

Maybe you don't want to move to the country and milk cows. Maybe you just want to grow your own tomatoes? Maybe you want to raise chickens so you can have fresh eggs? A lot of people are keeping honey bees in the city.

You can too!

Find something that excites you and try it! So what if you don't know how. Check out a book from the library and ask a friend to try with you! What if you fail? So what? Try again, or find something else to try. One of the best feelings in the world is the satisfaction of knowing that you can do something new to provide for your family. Try it and see!

A while back when we were more than usually busy and my house was more than usually messy, I asked myself why am doing this, and I decided to write down a list of all the new things I've tried and accomplished since becoming a farmer over three years ago.

It was very encouraging to know that even though I don't seem to ever have sparkling bathrooms, I have learned to make kombucha, several kinds of cheese, butter, yogurt and much more. I've learned how to milk cows, detect a heat cycle in cows, raise sheep, pigs, turkeys and a little about honey bees.

I've learned what kinds of fencing will keep a pig in, when to plant clover in your pastures, what kind of potatoes grow well here, marketing, how to nurse a baby in a sling while stirring dinner with one hand and answering emails on my phone with the other.

I've discovered it truly is better to give than receive. We've become surrounded with some of the most wonderful people we could have ever dreamed of meeting. The best part is we get to spend our days as a family, taking care of animals that will help heal the people in our lives! I can't imagine anything better than that!

I believe one day I'll look back and not care that my house was never spotless, and I'll be happy that I've learned so much about providing for my family! I encourage each one of you to start with something and see how much you can learn!

Sincerely,
Genevieve
Pokrov Farm

Genevieve Cruzwww.pokrovfarm.com
Genevieve and her family moved to a 35 acre farm in Sandy, Oregon to improve their health and begin providing others with good food, too. They specialize in grass fed/finished beef and raw milk. She is a stay at home mom who began researching health and nutrition about eight years ago which led them to become farmers in 2008 and begin selling raw milk in March of 2009. She's learned many things while living on a farm and hopes to continue learning more. She loves having people over to visit and cook for them!

Friday, April 13, 2012

Kombucha - The Brew of Champions

Wanting to ward off those nasty lingering colds from this winter? Maybe you are looking for an alternative to coffee &/or soft drinks? Or maybe you are looking for a new choice of “juice” for you littles, instead of feeding them the pasteurized liquid sugar from the super market. 

Whatever your reasonings may be, Kombucha deserves your attention and a try.


Kombucha has become a new emerging drink in your local grocery store but has actually been around for hundreds and even thousands of years, finding it’s origins in the heart of Chinese and Russian cultures.

The most inexpensive and nutrient packed version of this wonder brew can be made quickly and easily right in your own kitchen!

The Science Behind the Fizz

Kombucha is an effervescent drink formed from ancient fermenting techniques of using a “culture,” often times called a “Scoby,” which means “Symbiotic Culture of Bacteria and Yeast.” This scoby looks like a light brown pancake, and actually digests the sugars in the tea to produce a whole host of organic acids, vitamins, enzymes, and amino acids. Antibiotic, antifungal, and antiviral properties are all included in your homemade kombucha as well.

“...The Kombucha mushroom (which is actually a symbiotic colony of yeast and bacteria) acts on sugar and tea to produce not only acetic and lactic acid but also small amounts of a potent detoxifying substance called glucuronic acid. Normally this organic acid is produced by the liver in sufficient quantities to neutralize toxins in the body, whether these are naturally produced toxins or poisons ingested in food and water. However, when liver function becomes overloaded, and when the body must deal with a superabundance of toxins from the environment, certainly the case with most of us today, additional glucuronic acid taken in the form of kombucha is said to be a powerful aid to the body’s natural cleansing process, a boost to the immune system and a proven prophylactic against cancer and other degenerative diseases.” - Nourishing Traditions


Glucuronic acid is naturally produced in the body, but kombucha gives you an extra boost of this detoxing wonder. The Glucuronic acid binds to environmental and metabolic toxins so they can be excreted through the kidneys.
“Glucuronic acid is also the building block of a group of important polysaccharides that include hyaluronic acid (a basic component of connective tissue), chondroitin sulfate (a basic component of cartilage) and mucoitinsulfuric acid (a building block of the stomach lining and the vitreous humor of the eye).” - Weston A. Price

A by product of the glucuronic acid is glucosamines, which have had their own share of the health news lately. These “structures” have been associated with joint, cartilage, and collagen health. Also produced is Gluconic acid, not to be confused with the above mentioned Glucuronic acid, which can greatly help those suffering from yeast infections such as candidiasis or thrush. It is shown to protect against stress and improve liver function. 

Some people initially experience a detox effect from the natural cleansers in this powerhouse drink, mistakenly considering it an “allergic” reaction or adverse effects on their pre-existing health ailments.... Don't fall into this trap. 

Understand that if your body is toxic it is in need of purging; start drinking this slowly and gradually increase you amounts. This will allow you to bypass some if not all of the “detox” symptoms, which include, but are not limited to:
muscle ache’s and pains, head ache, lethargy, loose stools, etc...

(I am not a doctor, so please be wise about what your symptoms may be and see a medical professional if you are concerned about any persisting symptoms.)

Making Kombucha at Home

Teas to use: Black, Oolong, Green. White and Red are permissible to use, but recommended that you use them in conjunction with a black, oolong, or green. Because of the fermentation process, Kombucha requires real tea, not herbal tea. You also want to be careful of using any tea that holds strong fragrant oils, such as bergamot in Earl Grey. You can used bagged tea or loose leaf.

Where to purchase a scoby: The cheapest way would be to find a friend who has one to give, but if you have no such luck... You can grow one on your own, although I will not cover that here. But purchasing one is a good way to get a healthy scoby if you can't find a friend. 

Here are a few options and sites to purchase a scoby from and that I have found helpful in my journey of experimenting with kombucha. You can also purchase jars and other items helpful in making kombucha at most of these sites.
Kombucha Rediscovered by Klaus Kaufmann is a good resource as well

Here are quick general direction on how to make Kombucha. There are many recipes out there and anyone who has brewed for a while will have their own personal secrets and tips, so go experiment!

You can choose to do continuous brewing vs. batch brewing. I explain the batch brewing method here. Continuous brewing has great benefits although I have found for experimenting and learning sake, the batch method has been most convenient for me. But, experiment and see what you like best. 

Kombucha Brewing Instructions:


This is for one gal of kombucha. You can make several batches at one time, you just need a very large pot for boiling the water. During my research I have found some recipes that use only 3-5 cups of boiling water to add the tea to, then add cold water on top of that. This allows the tea brewing process to be faster because you don’t have to wait for the entire liquid contents to cool off. I have not used this method (although I will personally be experimenting with it) I will continue explaining the instructions with the method of boiling all the water.

Boil 3-4 quarts water, mix in 1 cup organic sugar and place 4-6 organic black (green, white, or oolong) tea bags in the tea. Let sit until room temp (this is the only thing I use sugar for in my kitchen, so I just keep a large glass jar full, and ready for adding to each new batch). You can also use raw honey, or agave, but both have slight variations to the end product, so if you are new, I would stick with the sugar initially.
Once cooled:
Remove tea bags and mix in 1-2 cups of the previous batch of kombucha into the room temp tea. Pour into a glass jar (I use gallon sized jars, but half gallon works great too), place kombucha mushroom (scoby) gently in tea, with the light colored side facing up. Stringy brown particles are normal to find on the scoby, you will mainly see them on the bottom.The top side may be very smooth as well. The new “baby” scoby will begin to grow on top as the kombucha ferments.

You may find specific instructions to start a new scoby if purchasing a starter kit, so follow the instructions you receive with it.

You can leave your kombucha to ferment anywhere that is warm and away from direct sunlight. Cover with a light towel, napkin, or paper towel, so it can still breath. Let sit uninterrupted from about 7-12 days. During this time the scoby will “eat” up the sugar during the fermenting process. I usually find that the best taste comes with leaving it for 10-12 days, but this does depend on the time of year and the weather. If left too long it will basically turn into vinegar.... not that I would know from experience or anything...ahhem. :)

Kombucha can be very hardy, so feel free to experiment with length of ferment time and types of tea to use. Some say that the kombucha has finished “eating” up the sugar when a sweet smell becomes noticeable from the jars.... I have left mine after smelling this with great results, it may also become more carbonated the longer you leave it.... SO experiment with what you like. Once you decide your kombucha brew is done, remove the scoby and then strain the kombucha through a mesh strainer into a clean jar. Use approx 1 cup of this batch to add to a new batch of cooled tea, place the scoby on top and you have begun a new batch. You will have two scoby’s now because each time your ferment your kombucha, a by product of the growing scoby is a new “baby” scoby that grows right on top of the original one. You can separate these, but I have found that leaving them together and allowing them to grow larger(thicker) and keeping a couple scoby’s in each batch produces a better flavor. Again, this is very dependent on your location and weather.

If you like a more fruit flavored drink or more carbonation, you may also want to try “re-fermenting” for a few days....

Many folks enjoy this drink specifically for the wonderful natural carbonation that it provides. To the dismay and chagrin of many first time kombucha brewers, you may find yourself with some batches that are less carbonated than others.

Here are a few tips to help get the carbonation just right the first time:

A healthy scoby that will grow all the way to the edge of your jar, will help “seal” the kombucha in the jar, so that the lack of oxygen underneath is allowing for further carbonation. 

If you notice small or large bubbles in your scoby, this is most likely the natural C02 trying to escape. 

If this does not quite do the trick for you, there is hope... 

Secondary fermentation can enhance the carbonation, if you do not get the desired results after your determined length of brew time. During this secondary fermentation you want to achieve what is called the anaerobic fermentation stage. This part of the fermentation is done “without air,” so you want to take up as much room in the bottle as possible, with the kombucha and fruit. This allows there to be as little oxygen as possible so that the yeast and bacteria will produce bubbles. 

After removing your scoby and straining your kombucha, you can bottle your concoction into a flip-top style, airtight container (see pictures, I have found this style to work best), add a bit of “sugar”, fruit (fresh, frozen, dried), honey, molasses, or refined sugar, all work just fine. Each will vary just a little bit in brew time and amount used, so keep that in mind. 

I have read in places that raw honey is not advised to use because it contains its own natural bacteria that could interfere with the growing kombucha, but I have never had a problem with using it. 

There are some noticeable differences, but those will change with type, location, temp as well. Again, just experiment. 

Ginger makes a great fizz (don't ask me why, because I don't know), and I love experimenting with different flavors of tea and fruit. 

Allow the airtight bottle to sit at room temp for a few days. I find that mine do best anywhere from 4-7 days. Your time frame may be very different though, depending on your location, time of year, and temp in the room. 

Kombucha is a living organism and will vary in taste and consistency depending on its temperature and location. BE CARFUL.... sometimes they become very carbonated and some can have the tendency to explode like shaken soda if left too long. :)
HAPPY BREWING!

Thanks to Madey Edlin for the fabulous photos!
madeyedlinblog.com


Kelsey Willard
Kelsey's Health-Food-Courses
www.lifeatthewillards.blogspot.com
Kelsey is a firefighter/paramedic with Clackamas Fire and a dedicated homemaker who has successfully tackled health issues through alternative cooking. Kelsey shares her love of wholesome food with others through small scale health food courses and friendly conversation. She is dedicated to living well and staying fit, and she and her husband are in excited preparations to grow their family through adoption.

LinkWithin

Related Posts Plugin for WordPress, Blogger...